Two-screen balance
Balance an Asymmetric Monitor Light Across Two Screens
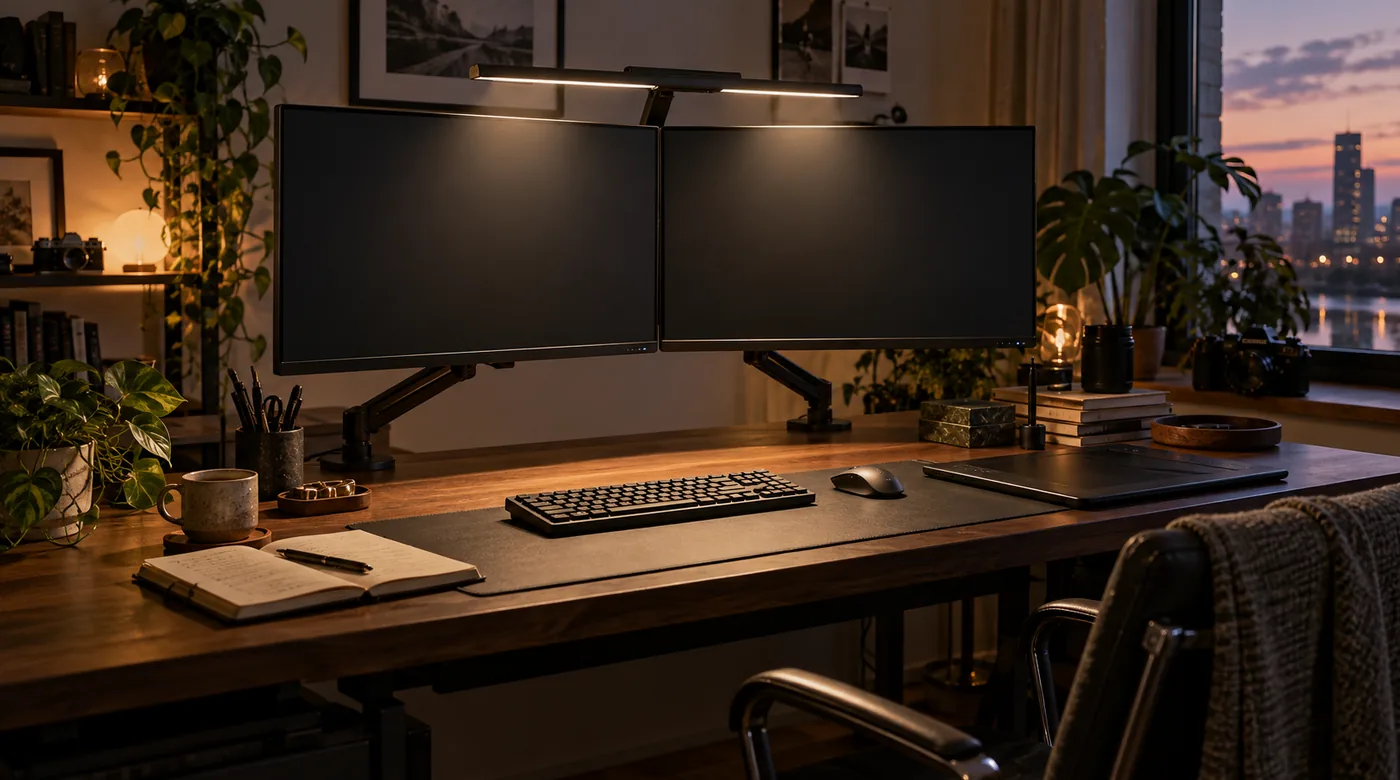
Two angled monitors create a seam, two viewing angles, and often two different reflection paths. A single desk light can still work, but it needs a more deliberate check.
Start with the displays, not the midpoint
Centering a bar over the physical gap may be sensible, yet it is not automatically the best optical position. First look at the display faces from the chair and identify which panel holds the task that needs the most surrounding desk light. If one screen is a reference display and the other is a communication screen, their angles and brightness may already differ. The light should not force them into a false symmetry.
Keep both panels on a dark neutral image while you look for reflected bands. Name the primary panel and the primary paper zone before moving the lamp. On an asymmetrical workstation those two priorities may sit on opposite sides, so the best mounting point can fall away from the physical center. Place a small object at the paper target and view both screens from the normal chair position. The object marks where useful output must reach while dark panels reveal where spill should not appear. If the displays serve equally important tasks, repeat the test after turning toward each one rather than averaging two postures into an imaginary straight-ahead pose. This priority map makes later compromises explicit instead of accidental.
- Reference
- Choose the task zone before choosing visual symmetry.
Read the seam as a reflection path
The space between monitors can act like a small corridor for direct light, especially when the panels are angled inward. A bright seam is not always a problem, but it can draw attention when the surrounding desk is subdued. Lower the bar and move it back slightly before adding more light. If the seam becomes quieter while paper remains legible, the original position was likely throwing too much light forward.
Watch the seam from each normal chair position. A reflection that only occurs when turned toward one panel may be solved by a small lateral adjustment. Examine the seam with one display awake and the other dark, then reverse them. This alternating view separates a luminous software edge from a reflection crossing the gap. If a narrow highlight follows the darkened panel, change the bar’s lateral position a few millimeters and observe whether the highlight moves or disappears. Keep the panel angles fixed during that pass. Adjusting both the screens and the lamp at once erases the clue provided by movement. A central gap need not be visually empty, but it should not become a bright vertical landmark that pulls attention away from the active document.
| Check | Test both seated angles, not just the centered pose. |
|---|
Balance writing zones
A dual-monitor desk often has two work surfaces: a central keyboard zone and a side notebook or control pad. Decide whether the lamp needs to support both at once or whether one deserves priority. Trying to flood the entire width can make the outer edges bright and the screen faces reflective. A smaller calm field is usually more useful than an ambitious field with no visual boundary.
Move paper through each zone and note where shadows from hands become distracting. This is a task map, not a brightness contest. Use index cards to mark the two writing zones rather than trying to illuminate the entire desktop. Slide each card through the expected hand positions and compare legibility without relying on a camera exposure. A broad but weak field may serve both zones; a narrower field may require prioritizing the side where paper is used longest. Observe shadows cast by the monitor stands, because overlapping supports can create a dark wedge that additional brightness will not correct evenly. Relocating the target object or changing bar position may solve that obstruction more cleanly than increasing output across both screens.
Account for unequal screen finishes
One panel may be matte while another has a glossier coating, or a laptop may sit beneath one of them. The same beam can be invisible on one surface and obvious on another. Run the reflection test separately with each screen darkened. If only one panel catches a strip of light, aim to change the bar position before changing that panel’s brightness or color settings.
When the panels have different heights, use the higher screen as the strictest cutoff reference. Different coatings require separate evidence. Show the same dark gray image on each panel, then switch both off if their hardware permits. A mark visible only on the glossier face points to a return angle, while a mark that persists on both may come from direct spill or a room source. Compare from the chair rather than pressing close to the glass, since the viewer’s position completes the reflection path. The stricter panel can set the lamp’s upper boundary, but it should not force unnecessary changes to the other display’s color or brightness. Treat finish as geometry, not as a performance ranking.
Avoid stacking two bright bars by default
Adding a second light can solve a real width problem, but it can also create overlapping pools that are harder to control. Confirm that one bar cannot be repositioned or dimmed before doubling the sources. If two bars are genuinely needed, set each lower than a single-bar setting and test them one at a time. That sequence reveals which source creates a reflection and whether their overlap makes a bright central ridge.
Keep their cables and clamps independent so an adjustment to one screen does not disturb both sources. Before adding another bar, cover half of the existing lamp with an opaque card held safely away from hot or electrical parts. This temporary split shows whether each side truly needs independent control or whether one mount position already reaches both work zones. If a second source remains justified, activate one at a time and mark the edge of each pool on paper. Bring them up together at low output and inspect the center for a ridge. Two moderate fields should meet without creating a bright runway. Follow each manufacturer’s mounting and electrical instructions; the exercise only clarifies the visual interaction.
- Introduce the second source only after the first is understood.
Check laptop and tablet positions
A laptop below a monitor has a glossy surface that sits closer to the desk light’s preferred target. It may receive a strong reflection even when both larger panels remain quiet. Place the laptop where it is normally used, open a dark page, and vary its lid angle. Moving it a little sideways can be more effective than forcing the overhead bar to serve every device equally.
Likewise, test tablets in their writing orientation rather than flat on the desk. A laptop below the displays creates a third plane with its own tilt and closer distance to the source. Open a dark neutral window, set the lid to the working angle, and turn the chair between the large panels. A reflection that appears only during one turn may be reduced by shifting the laptop laterally rather than disturbing a well-balanced overhead field. For a pen tablet, test the raised drawing angle and the flat keyboard-like position. These smaller devices deserve individual checks because their surfaces can catch the strongest part of the downward distribution even when both monitors remain visually quiet.
- Assess each smaller screen in its working angle.
Hand off to the next decision
Return to the main field guide for the whole setup sequence, then use the dimming and warmth guide once the physical beam is settled. A two-screen desk rewards modest changes. Record which panel is most sensitive, where paper can sit comfortably, and the output level that keeps the seam inconspicuous.
That record makes future monitor swaps less mysterious because it separates new hardware behavior from a changed lamp position. Write a two-column handoff note: one column names the panel most likely to reflect, and the other names the desk area that must stay readable. Add the chosen mount offset and output level underneath. When a monitor is replaced, preserve the task priority and repeat the dark-panel sequence instead of assuming the former number will suit a new coating or height. This compact record also reveals whether a future problem began with changed hardware or with a moved lamp. A dual-screen arrangement becomes easier to maintain when its compromise is stated plainly rather than hidden behind a centered appearance.
Treat the seam as a clue about geometry, not a defect to hide.
Write down the compromise between two panels
A workable result identifies the sensitive display, preserves the primary desk target, and keeps the center gap from becoming a luminous landmark. Those priorities matter more than making every edge symmetrical. Record the lateral offset and panel angles so a future hardware change starts from evidence rather than appearance.
Use another field note only when its question matches the remaining fault: the surface guide for a wandering cutoff, the cable guide for movement-induced drift, or the maintenance note for a new reflection. The paired-display verdict should narrow the next experiment, not multiply adjustments.