Beam reading
Read an Asymmetric Beam on a Real Work Surface
A shaped optic is easiest to understand when you stop looking at the lamp and start looking at paper, keys, glass, and the dark edge of the monitor.
Choose a plain test surface
Use a sheet of uncoated paper, a dark notebook cover, and one glossy object such as a tablet. These surfaces reveal broad illumination, useful contrast, and unwanted sparkle without specialized equipment. Place them where work actually happens. A test performed at the very center of an empty desk can miss the angled notebook or side tablet that receives most of the usable light.
Turn off other decorative lights for a few minutes so their reflections do not confuse the observation. Arrange the paper so one edge sits beneath the screen and the other reaches the hand’s usual writing position. That orientation exposes whether the field fades smoothly or breaks into a conspicuous stripe. A dark cover beside it helps reveal scattered spill that white paper can disguise, while the tablet supplies a movable mirror for angle checks. Avoid using a metallic ruler as the only reflective sample because its narrow flash can exaggerate a minor hotspot. The three materials together create a practical contrast set. Their purpose is comparison across positions, not measurement of illuminance or proof of any optical specification.
| Check | Use ordinary materials that represent the workday. |
|---|
Find the upper edge of the beam
Bring the bar to a low output and look at a dark screen while the paper remains on the desk. The important boundary is where the useful pool ends near the display, not where the lamp itself appears brightest. Raise or lower your chair slightly. If a reflection climbs across the panel only when your eye level changes, the upper cutoff may be too close to the screen or the bar may be pitched too far forward.
A quiet dark screen is a better confirmation than a bright desk. It shows whether the asymmetric distribution is doing the separating work promised by its shape. To locate the upper boundary, place a pencil across the rear of the paper and slide it slowly toward the monitor. Watch its shadow while keeping the display in peripheral view. A sudden change near the bezel suggests a sharp transition; a gradual softening indicates wider falloff. Neither result is automatically superior, but the boundary should remain below the part of the panel that catches direct spill from the chair. Repeat after raising the seat by a small amount. Eye height does not move the beam, yet it changes which reflections return to the viewer, making it an essential part of interpreting the cutoff.
Observe the cutoff while both paper and panel are visible.
Watch the keyboard transition
Keys need enough light to be found without turning the front row into a bright band. Look for an even transition from the notebook area to the keyboard, then to the nearer desk edge. If the keyboard is much brighter than the paper, the bar may be pushed too far forward. If the paper is bright only near the display, the bar may be too far back or aimed too steeply down.
Change position in small increments and reassess after each change. Large moves make it harder to learn which part of the geometry caused the improvement. Read individual key rows rather than judging the keyboard as one dark block. The legends at the rear may disappear when the optic ends too close to the display, while the space bar can become a bright reference if output is thrown forward. Rest both hands in typing position and note whether their shadows obscure frequently used keys. This is especially revealing with tall keycaps or a steep keyboard angle. Adjusting the light for the instrument in front of it produces a calmer result than maximizing the illuminated rectangle. The desired transition keeps controls legible without making the nearest row the visual center of the desk.
- Move the mount in small increments, not dramatic swings.
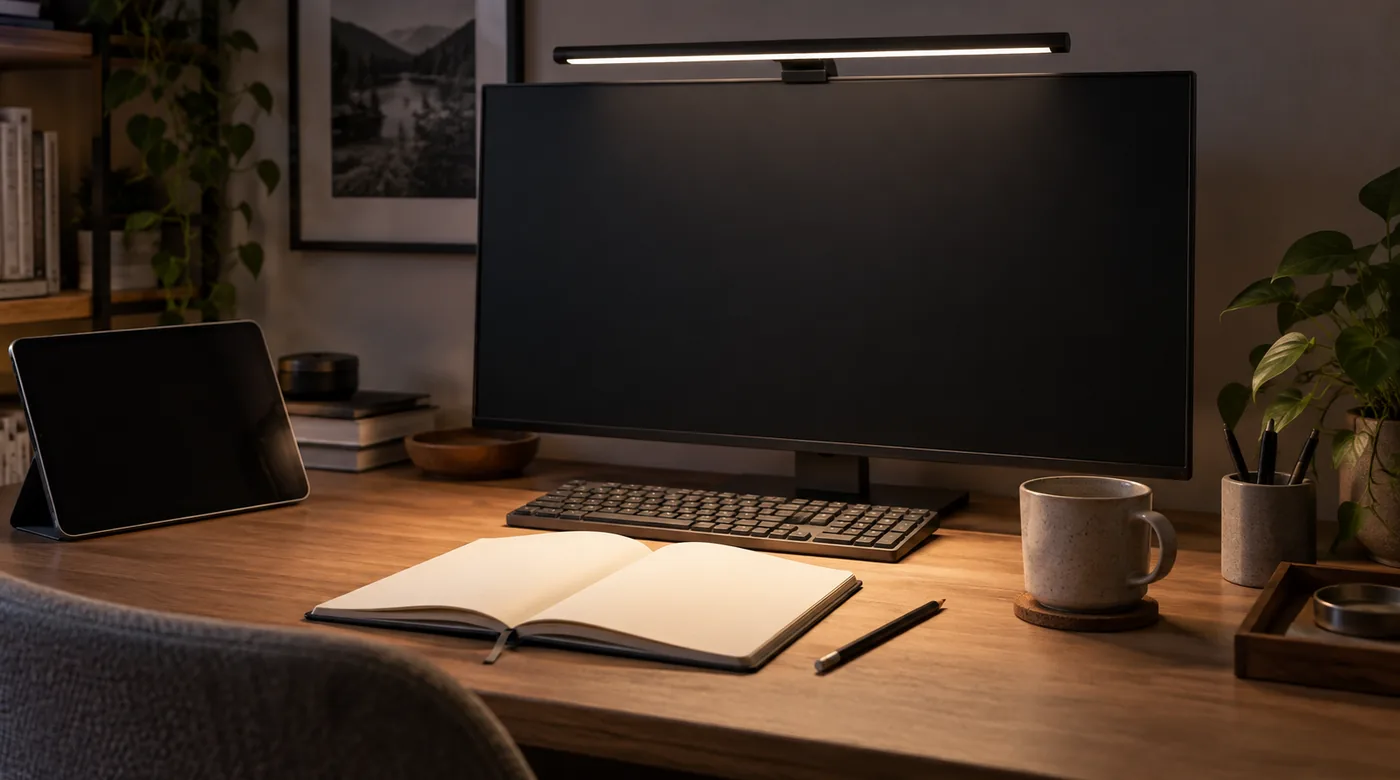
Separate reflection from contrast
A display can look less comfortable because of a reflection, because its own brightness is high, or because surrounding light is very low. Treat those as different causes. First cover the lamp briefly with a notebook without touching display controls. If the problem disappears, light placement is implicated. If it remains, look at screen settings and room conditions before blaming the optic.
This simple separation prevents compensating for a misplaced lamp by making the screen unusually bright or unusually dim. A quick occlusion test works best when performed without touching the lamp. Hold an opaque card above the rear desk zone so it interrupts the suspected path but does not cover the screen. If the reflected patch changes shape immediately, the desk light is involved; if it remains, search the room for another source. Move the card only enough to confirm direction. Waving it broadly can darken several sources at once and obscure the diagnosis. Once the responsible path is identified, alter either position or object angle in a small step. Screen brightness should remain stable during this experiment so it does not become a second explanation.
Check angled paper and tablets
Writing surfaces are rarely flat to the desk at every moment. Lift a notebook on a stand, tilt a tablet, and open a glossy reference sheet. Each can return a different part of the beam toward the eyes. A good asymmetric setup will not make every reflective object invisible, but it will give you a workable area with predictable behavior. Shift the object before reaching for maximum dimming.
If a reflection travels with the object, it is often an angle issue; if it stays fixed at the screen edge, revisit the lamp position. When a tablet is used for handwriting, test the stylus angle as well as the stand angle. A wrist can block part of the field and make an otherwise even pool seem dim on one side. Rotate the tablet through the orientations used for notes, drawing, and reading, then identify which pose returns the strongest streak. The lamp does not need to eliminate every glint from glass; it needs to leave a practical pose where content remains visible and hand shadows are manageable. If that pose is too constrained, reconsider placement before accepting a permanently low setting that leaves the rest of the desk underlit.
- Reference
- Tilt the object as you would during actual work.
Use low output as the baseline
Set the lowest level that leaves handwriting, cable labels, and key legends usable. Starting low makes stray spill easier to see and protects you from interpreting intensity as quality. Only increase output after the field is even. A brighter uneven pattern remains uneven; it simply makes the bright edge and reflected streak more obvious.
Keep the room’s ordinary ambient condition in the test. A perfect result in a darkened room may not hold during the afternoon. Establish low output with a task that contains fine detail, such as handwritten annotations or connector labels, rather than an empty white page. Increase one step only when the detail cannot be read comfortably in the ordinary room. Then pause long enough for the initial impression of brightness to settle. A high setting often feels impressive during the first seconds and tiring or distracting later, while an adequate low field can seem understated at first. This observation does not diagnose eye strain or prescribe a health outcome. It simply keeps the optical comparison anchored to recognizable desk work and a repeatable ambient condition.
Connect the beam to the hub
The beam test tells you what the light is doing on this desk, while the broader field guide explains how mounting, warmth, and daily movement influence the same result. Keep one note about the successful position, paper location, and output level. That makes a later change easier to diagnose than relying on memory.
For desks with two panels, continue with <a href="dual-monitor-beam-overlap.html">the dual-monitor overlap guide</a>; a good single-screen cutoff can behave differently across an angled pair. Save the successful arrangement as a small diagram showing the rear boundary, paper position, and one glossy reference object. During later checks, recreate those three points before deciding that the lamp’s distribution has changed. Dust, a different notebook finish, or a shifted screen can otherwise look like an optical fault. The diagram also gives a dual-monitor experiment a known starting condition: preserve the single-panel cutoff, add the second display, and observe what the new angle introduces. That sequence isolates geometry more effectively than rebuilding the whole station at once. It leaves each correction tied to an observed surface rather than a remembered impression.
- Treat the observation as a repeatable desk check, not a one-time verdict.
Leave the desk with an optical baseline
Keep the three reference surfaces and a small position diagram as the baseline. They let a later inspection distinguish a moved object from a changed beam. The useful conclusion is not that glare has vanished everywhere; it is that the work zone has a predictable boundary and at least one comfortable orientation for reflective tools.
If the field fails only after a second panel is added, follow the paired-screen path. If brightness or warmth obscures the boundary, use the evening-controls note. A mounting obstruction should return to the clearance map. The baseline tells you which question is now specific enough to investigate.